Adding custom fields in the results of Smart Search and JFilters
The results page of the Smart search allows us to display some fields (image, category, date, etc.) but not custom fields. As the Joomla's custom fields provide a very flexible way for adding extra properties to our content, showing them to the search results can make the results more meaningful.
Something already mentioned in another post about customizing the search results layout, is that we can create sub-layouts for each specific content type of the results. For example, we can create different sub-layouts for our articles and our contacts. We can create those sub-layouts by utilizing the Joomla’s template overrides in the Cassiopeia template.
In that post, we are going to create a sub-layout for our article results and modify it accordingly to display custom fields.
Before:

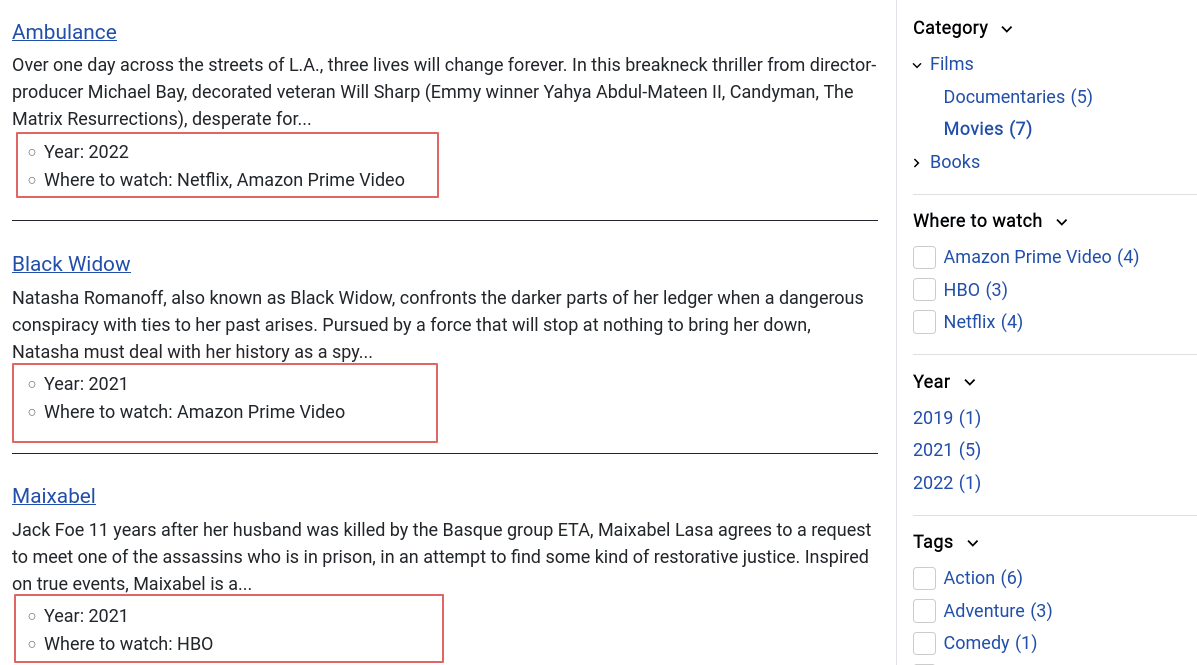
After:
Create the articles sub-layout
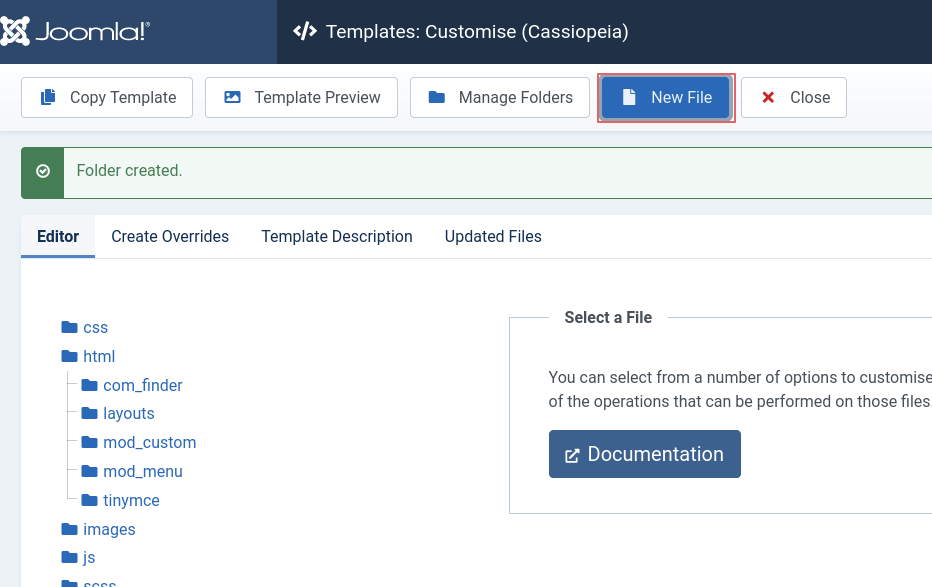
Go to System > Templates > Site Templates and then select Cassiopeia Details and Files.
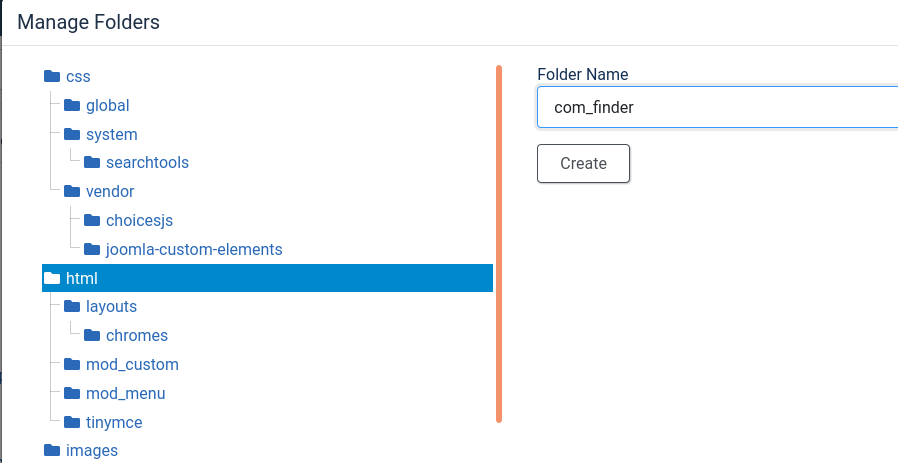
From there, press the Manage Folders button.

Then create a folder within the html folder and name it com_finder.
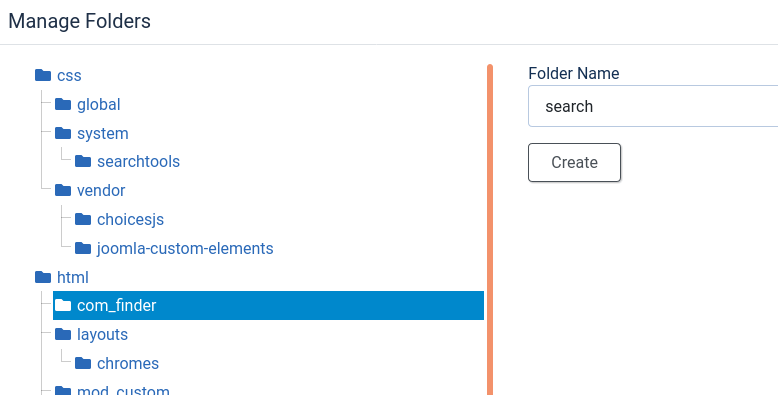
Create a new folder within the previously created com_finder folder and name it search.
After that, we will create a New File within the com_finder/search folder.
Name it default_article and select php as File Type
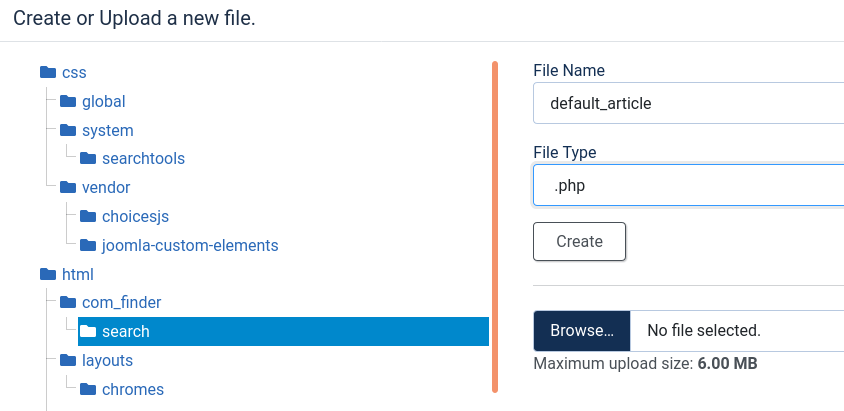
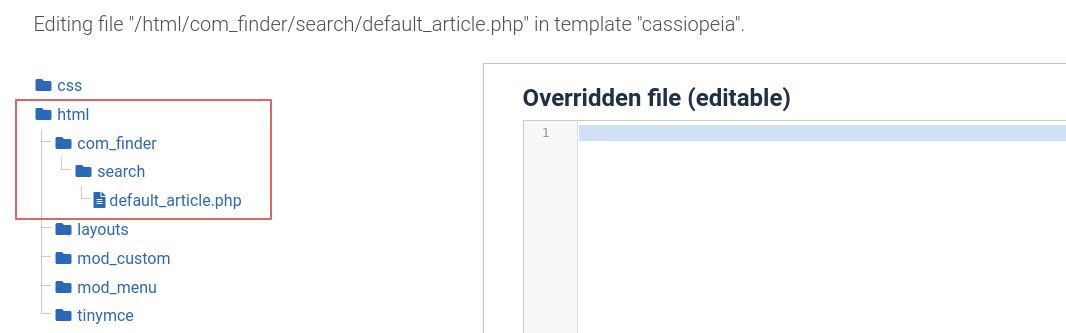
At the end, you should have a file: html/com_finder/search/default_article.php in your template’s directory.
Adding code in our sub-layout
As a base, we will use the code from the file: components/com_finder/tmpl/search/default_result.php. This file contains what is currently used for a result item. Please copy the contents of that file into your newly created file (default_article.php).
You can edit php code in the default_article.php, either from the template’s editor (loaded after selecting the file in the template) or from an IDE of your choice.
Adding custom fields
At the start of the file, after the line 20 add:
// Creates an array with all the CF of the current article. The true param allows us to get also a rendered value together with the rawvalue
$articleCustomFields = Joomla\Component\Fields\Administrator\Helper\FieldsHelper::getFields('com_content.article', $this->result, true);

// Creates an associative array using the custom field id as a key.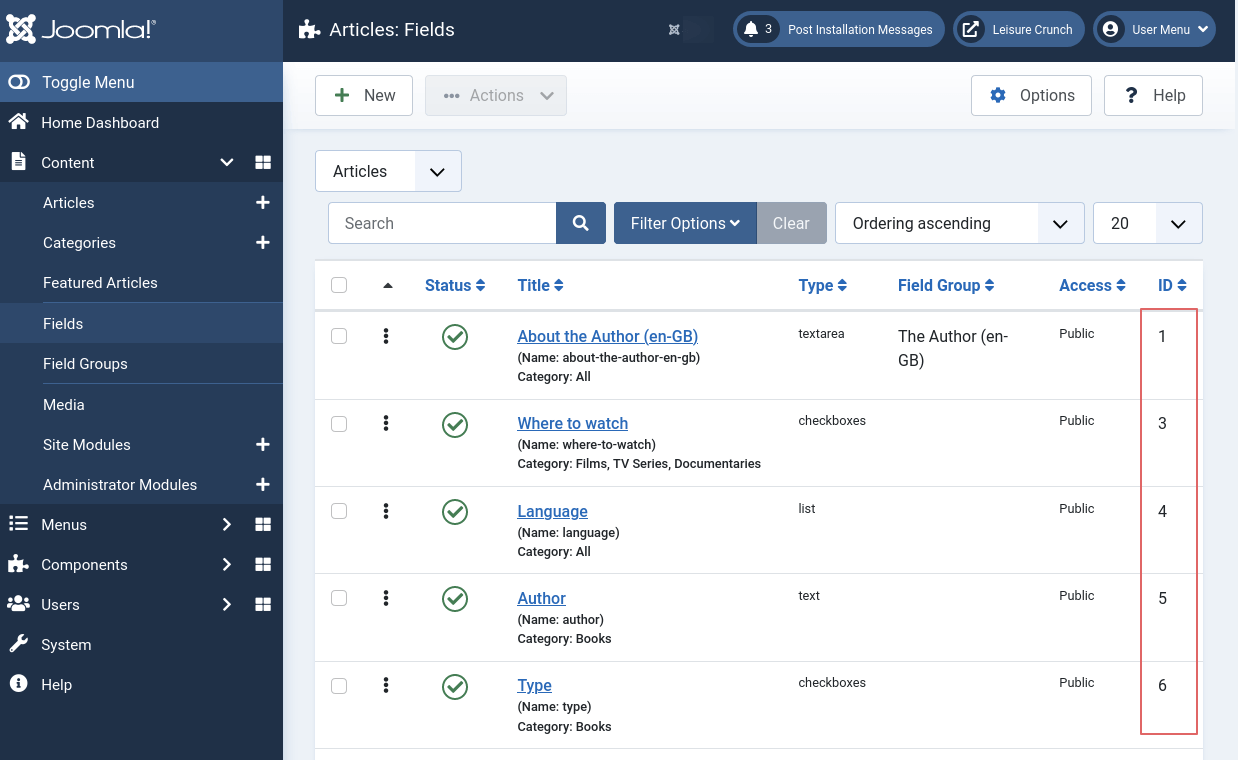
$articleCustomFields = \Joomla\Utilities\ArrayHelper::pivot($articleCustomFields, 'id');Next track the ids of the custom fields you would like to display.
Go to the Content > Fields and find the ids of the fields you want to display.
Now we can add the html code to display the custom fields.
Before the </li> element, at the end of the file add:
<ul class="fields-container">
        <?php
        // We are using the custom fields with ids 10 and 3
        if (!empty($articleCustomFields[10]->value)) : ?>
            <li class="field-entry">
                <span class="field-label"><?= $articleCustomFields[10]->label ?>:</span>
                <span class="field-value"><?= $articleCustomFields[10]->value; ?></span>
            </li>
        <?php
        endif; ?>

        <?php
        if (!empty($articleCustomFields[3]->value)) : ?>
            <li class="field-entry">
                <span class="field-label"><?= $articleCustomFields[3]->label ?>:</span>
                <span class="field-value"><?= $articleCustomFields[3]->value; ?></span>
            </li>
        <?php
        endif; ?>
    </ul>
Now if you visit your front-end and perform a search or a filtering we will see the our results with custom fields!
Using alternate layouts for the custom fields.
Each custom field can have it's own alternate layout which can be selected from it's back-end options. If such a layout is selected, the code we used will not work. In that case we have to render the custom field through it's renderer by specifying the layout.
The code should be like:
<?php // myAltLayout is the name of the layout ?>
<?= Joomla\Component\Fields\Administrator\Helper\FieldsHelper::render('com_content.article', 'field.myAltLayout', ['field' => $articleCustomFields[10]]); ?>I would like to thank Marc Dechèvre (@woluweb) for covering this topic initially, and being the source of part of the code i posted here.